We all have one— a bag we’ve fallen out of love with or one we simply just don’t grab as often anymore. Rather than letting it gather dust or selling it off perhaps you might wish to customize it. Customization can breathe new life into an old favorite, and this is the route I decided to choose when it came to my vintage Louis Vuitton Speedy 35.
As an avid handbag collector the Monogram Speedy was one of my first handbag milestones, but something I eventually grew out of. Having lots of experience working with handbags and being a bit of a rebel, I decided not to let this perfectly good bag go to waste. Instead I decided to give my Speedy a new look with a personal touch via patches. Here’s how:
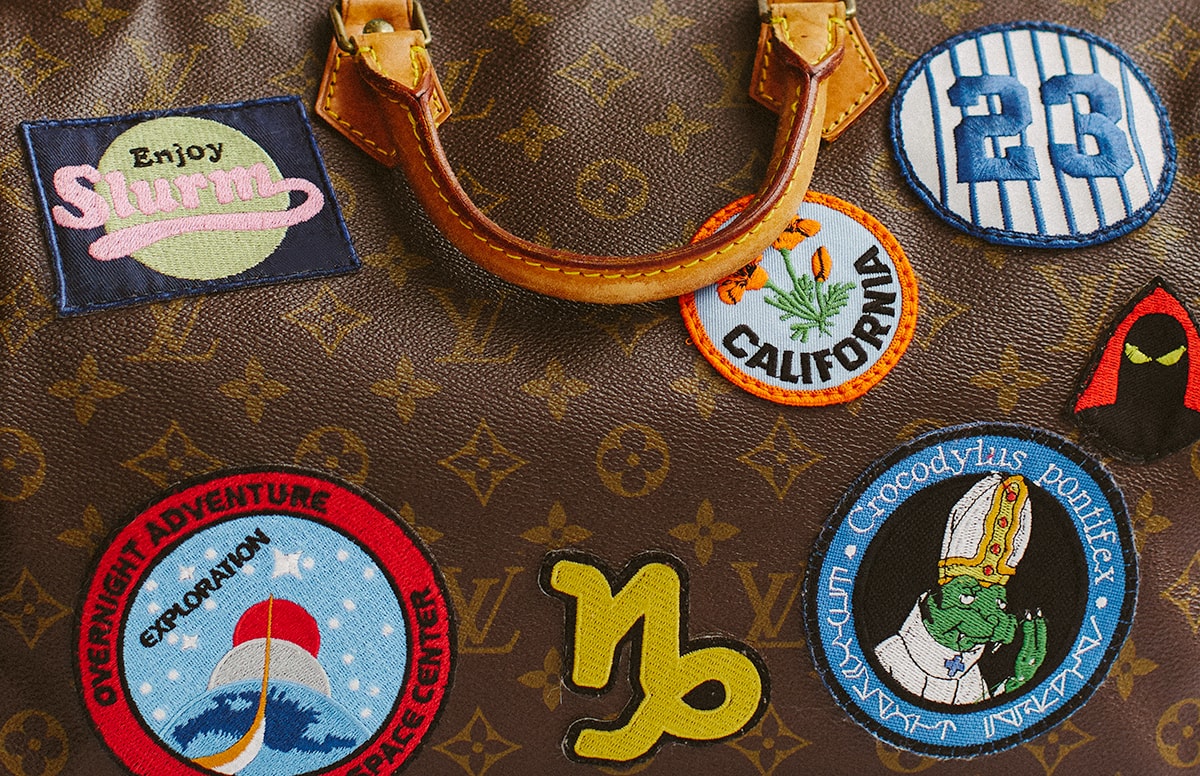
Step 1: Curate your patches
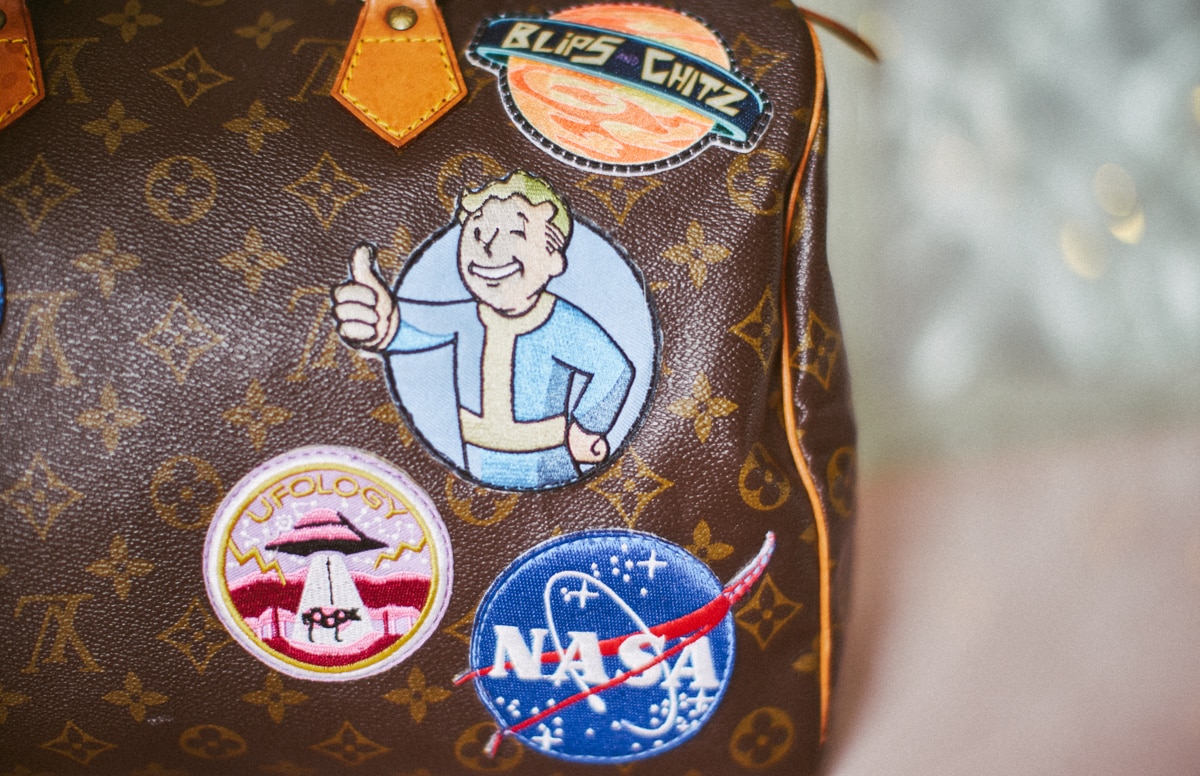
Find fun patches that express your interests and reference your past to make it personal. On mine I included my astrological sun sign, home state, and lucky number. In addition, I added NASA and Kennedy Space Center patches to my Speedy to represent my love of astronomy as well as some nerdy cartoon and video game references.
Be sure your patches are high quality, as some can unravel easily, or even pill. Patches that have a backing that covers the stitch-work adhere to the bag better, as they’re smoother. Avoid small patches with sharp edges as they don’t form to the bag as well and will be hard to stitch in place later on.
Step 2: Prep your canvas
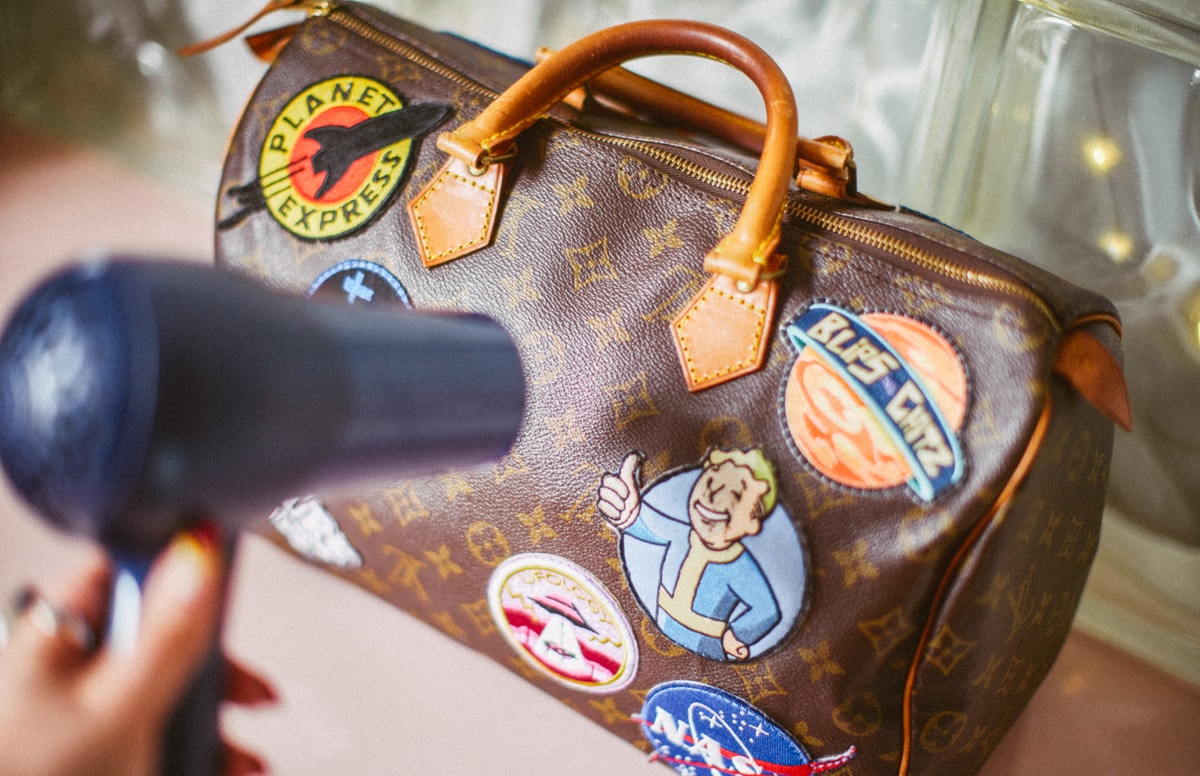
If your canvas has deep wrinkles or dents the patches will not set on the surface smoothly, causing the canvas to pucker once stitched. So to make sure my patches laid correctly, I took a blow dyer on low heat and warmed the areas where my canvas had creases. Once warm I began to massage the canvas in circles with the base of my palm. Be careful not to burn the bag or melt the plastic coating of the canvas, take your time and do not rush. This step could take a couple of days and you can practice on other materials until you are comfortable.
Step 3: Place your patches
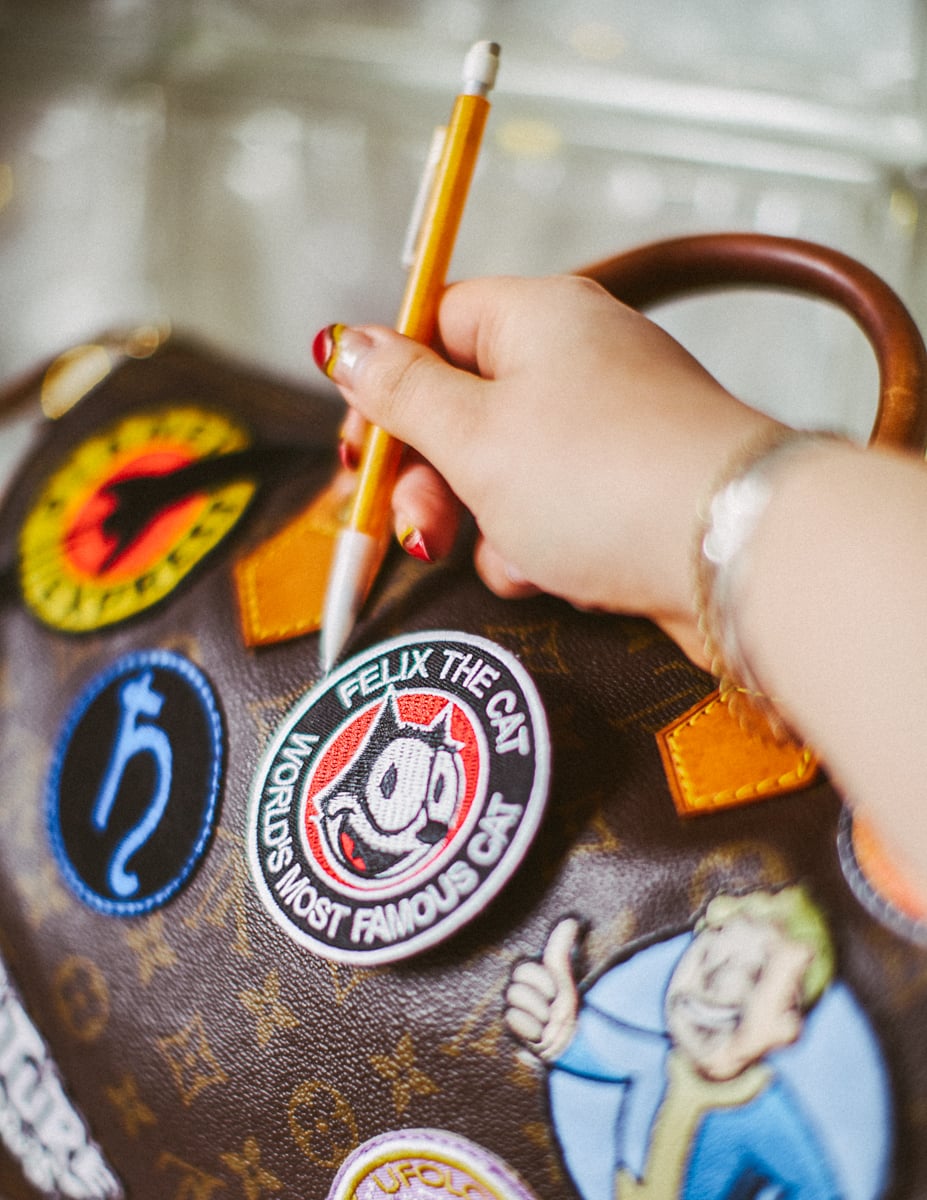
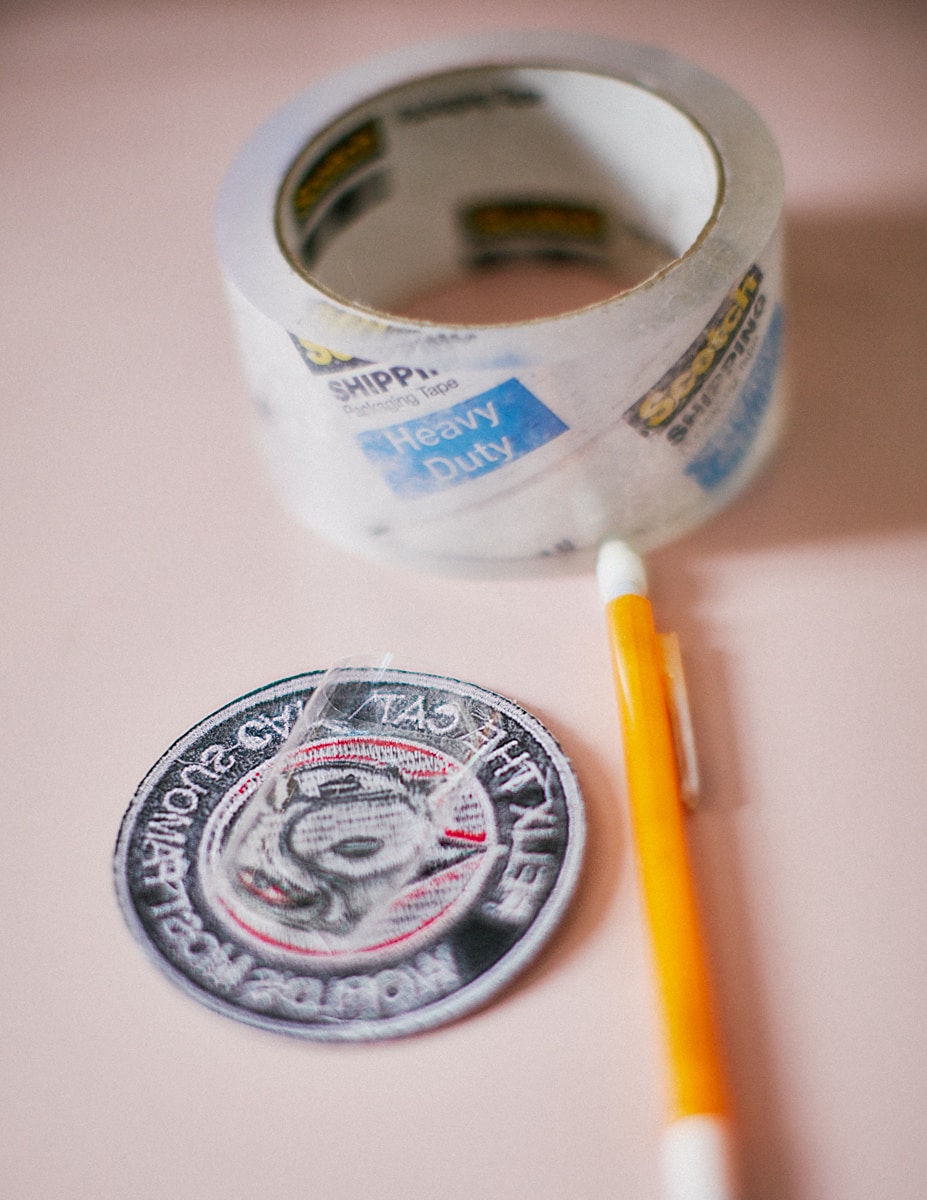
After you’ve collected all your patches, sort them by which side you would like to place them on. Use a piece of Scotch tape to play around with different compositions, it won’t hold well but it’s just to help you play around until you have an idea of what you like. Once I was happy with my placement, I lightly traced the outline of each patch with a pencil so I could easily decipher my arrangement later. Since Louis Vuitton’s canvas is essentially fabric dipped in plastic, the pencil should easily erase off the surface when you are done.
Step 4: Temporarily Adhere
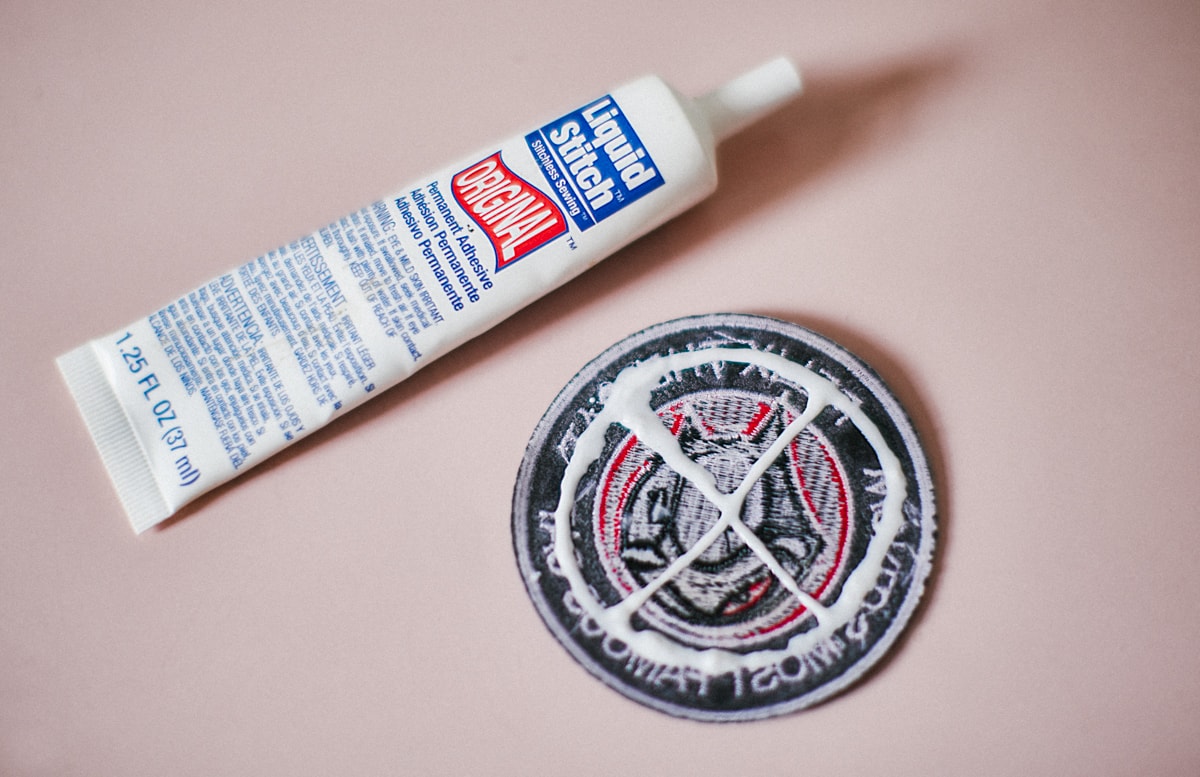
I used Liquid Stitch to hold my patches into place temporarily. Shake the container well before spreading onto the back of the patch. In the center of the patch, I applied a generous amount of glue. So that the glue has room to spread when applying, I allowed some space around the edge of the patch. If the glue bleeds out of the bottom when adhering, do not panic, it’s pretty easy to rub off when dry.
Apply pressure for one minute. When it seemed stable enough to not slip around, I used the blow dryer to speed up the drying process. This step took me over a week because I took my time to let the patches dry properly. I only applied a couple a night to avoid bumping a wet patch and having to start over. Try not to move the bag around too much during this process, as the Liquid Stitch is not a permanent hold. Once all the patches are dry in place you can move onto step five!
Step 5: Commit
Scary, I know! Once all your patches are settled you can sew them into their permanent place. The Liquid Stitch should hold them down well enough that they shouldn’t move around too much during this process. I personally do not know how to sew so I dropped my speedy off at The Leather Spa.
Step 6: Aftercare
Now go ahead and take that bag out of retirement, but be sure to keep your canvas healthy and moisturized to prevent cracking. It’s always a good idea to monitor the areas where the stitches are introduced to the canvas to catch any separation. A shaper is also recommended once the patches are attached to help support the canvas. Now that your bag has been born-a-new, it’s time to take her for a spin!
Please feel free to comment below with any questions, we are always here to help!